Cellulose acetate hair clip manufacturing is a multi-stage production process that transforms flat, pre-coloured acetate sheets into finished, polished hair clips through sequential operations of cutting, heating, shaping, polishing, branding, and assembly. Unlike ABS plastic clips — which are produced through high-speed injection moulding in a single automated cycle — acetate clips require a fundamentally different workflow that is more labour-intensive, produces higher scrap rates, and demands specialised equipment and skilled manual finishing.
For product managers, brand owners, and sourcing professionals evaluating acetate hair clip suppliers, understanding this production process provides critical context for lead time planning, cost structure analysis, and quality specification. Each stage introduces specific quality variables and potential failure points that affect the finished product. This guide walks through the complete manufacturing process from raw material to packed shipment, with technical parameters at each stage.
1. Raw Material: How Acetate Sheets Are Made
Acetate hair clip production begins not at the clip factory, but at the acetate sheet supplier. Cellulose acetate is a semi-synthetic thermoplastic produced by acetylating cellulose extracted from wood pulp or cotton fibres. The resulting material is formed into flat sheets — typically 2 to 4 mm thick for hair clip applications — through a layering and curing process.
Sheet Colour and Pattern Formation
The signature colour effects of acetate — tortoiseshell, marble, ombre, gradient, and translucent solid — are created during sheet manufacturing. Multiple layers of differently coloured acetate compound are combined under heat and pressure. The way these layers flow into each other during the process creates the natural variation and depth that distinguish acetate from solid-colour injection-moulded plastic. This colour formation is irreversible — once a sheet is produced, its pattern is fixed and cannot be altered during subsequent clip production.
Sheet Quality Variables
Not all acetate sheets are equal. Key quality variables include thickness consistency across the sheet (affects cutting accuracy and finished clip weight uniformity), colour batch consistency (affects visual matching across production runs), curing completeness (under-cured sheets are prone to warping and cracking after shaping), and surface defect rate (bubbles, inclusions, or uneven colour distribution). Incoming sheet inspection is the first and arguably most important quality gate in the entire production process.
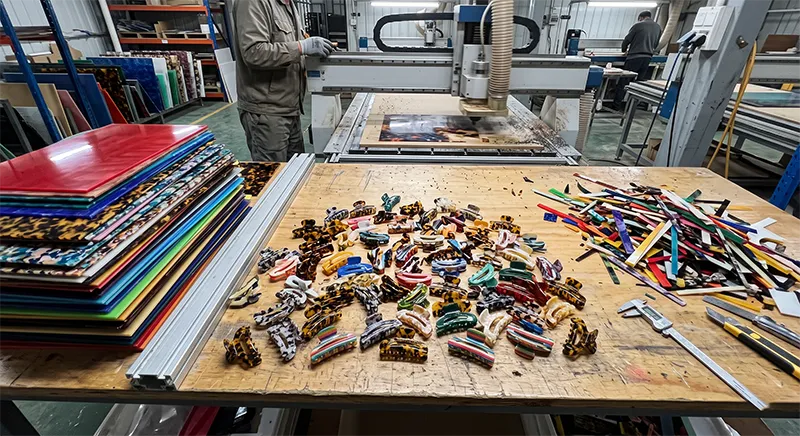
2. Stage 1: Cutting — Sheet to Blank
The first production stage converts flat acetate sheets into individual clip blanks — flat pieces cut to the outline shape of the finished clip before any curving or shaping has occurred.
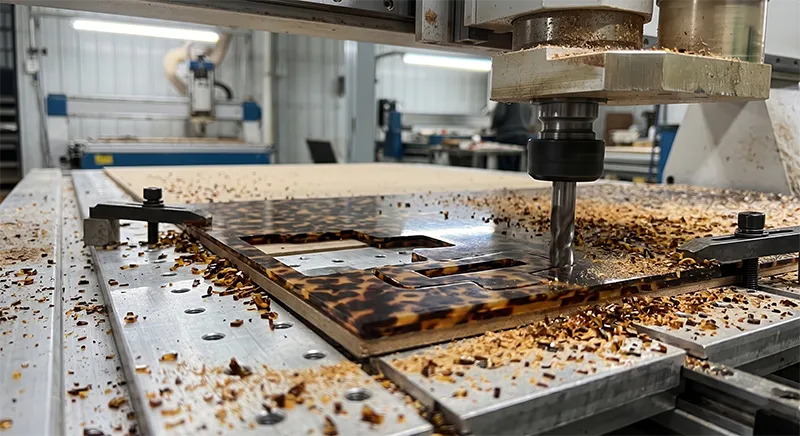
CNC Cutting
Computer numerical control (CNC) cutting uses a high-speed rotating blade or router guided by digital coordinates to cut precise blank shapes from the acetate sheet. CNC cutting is the preferred method for complex silhouettes, small production runs, and designs that require tight dimensional tolerances. It produces clean edges with minimal material stress but generates more offcut waste than die cutting.
Die Cutting
Die cutting uses a steel rule die (a shaped blade pressed into the sheet) to stamp out blanks in a single press stroke. It is faster than CNC for simple shapes at high volume, but requires a die for each unique shape. Die cutting is more efficient for large production runs of established designs where the die cost is amortised across thousands of units.
Offcut Handling
Unlike ABS injection moulding, where runners and rejects can be reground and reused, acetate sheet offcuts are waste — the material cannot be remelted. Efficient nesting (arranging blank layouts to minimise the gap between pieces) is a key factor in controlling material waste and per-unit cost. Experienced operators achieve 75 to 85 percent sheet utilisation; poor nesting can drop this below 65 percent, significantly increasing material cost per clip.
3. Stage 2: Heating and Shaping
After cutting, flat blanks are transformed into the three-dimensional curved form of the finished clip through a heat-and-press process.
Heating
Acetate blanks are heated to approximately 80 to 90 degrees C using infrared heaters, hot air ovens, or heated platens. At this temperature, the acetate softens sufficiently to be reshaped without cracking. Overheating degrades the material — yellowing, surface bubbling, and loss of translucency occur above approximately 100 degrees C. Underheating results in incomplete forming, spring-back (the blank partially returning to its flat state after moulding), and stress fractures at bending points.
Press Moulding
The heated, softened blank is placed into a metal shaping mould and pressed under controlled pressure. The mould defines the clip's curved silhouette — jaw angle, tooth geometry, and overall profile. Mould quality directly affects jaw symmetry, tooth alignment, and the precision of the interlocking mechanism. Worn or poorly maintained moulds produce clips with uneven bite, asymmetric jaws, and inconsistent spring-bar seating.
Cooling
After pressing, the clip remains in the mould until it cools below the glass transition temperature and the shape is permanently locked. Cooling time is typically 30 to 60 seconds depending on blank thickness and ambient temperature. Premature removal from the mould results in dimensional instability — the clip gradually relaxes back toward its original flat shape over hours or days.
| Shaping Parameter | Specification | Quality Risk if Incorrect |
|---|---|---|
| Heating temperature | 80-90 degrees C | Below: incomplete forming, spring-back. Above: yellowing, bubbling, translucency loss. |
| Press pressure | Controlled hydraulic (mould-specific) | Too low: undefined shape. Too high: material thinning at bend points. |
| Cooling time | 30-60 seconds in mould | Premature removal: dimensional relaxation over time. |
| Mould condition | Clean, calibrated, aligned | Worn mould: asymmetric jaws, uneven bite, poor tooth alignment. |
4. Stage 3: Polishing — The Most Labour-Intensive Step
Polishing is the defining stage of acetate clip production. It is what transforms a rough-edged, matte-surfaced moulded part into the smooth, warm, glass-like object that consumers associate with premium acetate accessories. It is also the most time-consuming and cost-intensive step in the entire process.
Tumble Polishing (Barrel Polishing)
After shaping, clips are loaded into rotating barrel tumblers along with abrasive media — typically small ceramic or plastic shapes — and a polishing compound suspended in water. The barrel rotates for several hours, causing the clips and media to tumble against each other. This action smooths all cut edges, removes burrs and sharp points, and prepares the surface for final hand polishing. The abrasive media grade is progressively reduced from coarse to fine across multiple tumbling cycles.
Hand Polishing (Manual Buffing)
After tumble polishing, each clip is individually buffed by hand on a rotating fabric or felt wheel using progressively finer polishing compounds. This stage achieves the final surface quality — the characteristic smooth, warm, organic sheen that distinguishes acetate from machine-finished plastic. Hand polishing requires skilled operators and cannot be fully automated because each clip's curved surfaces must be presented to the polishing wheel at varying angles to achieve uniform coverage.
The combined tumble and hand polishing sequence typically represents 30 to 40 percent of the total per-unit labour cost for an acetate clip — more than any other single production stage.

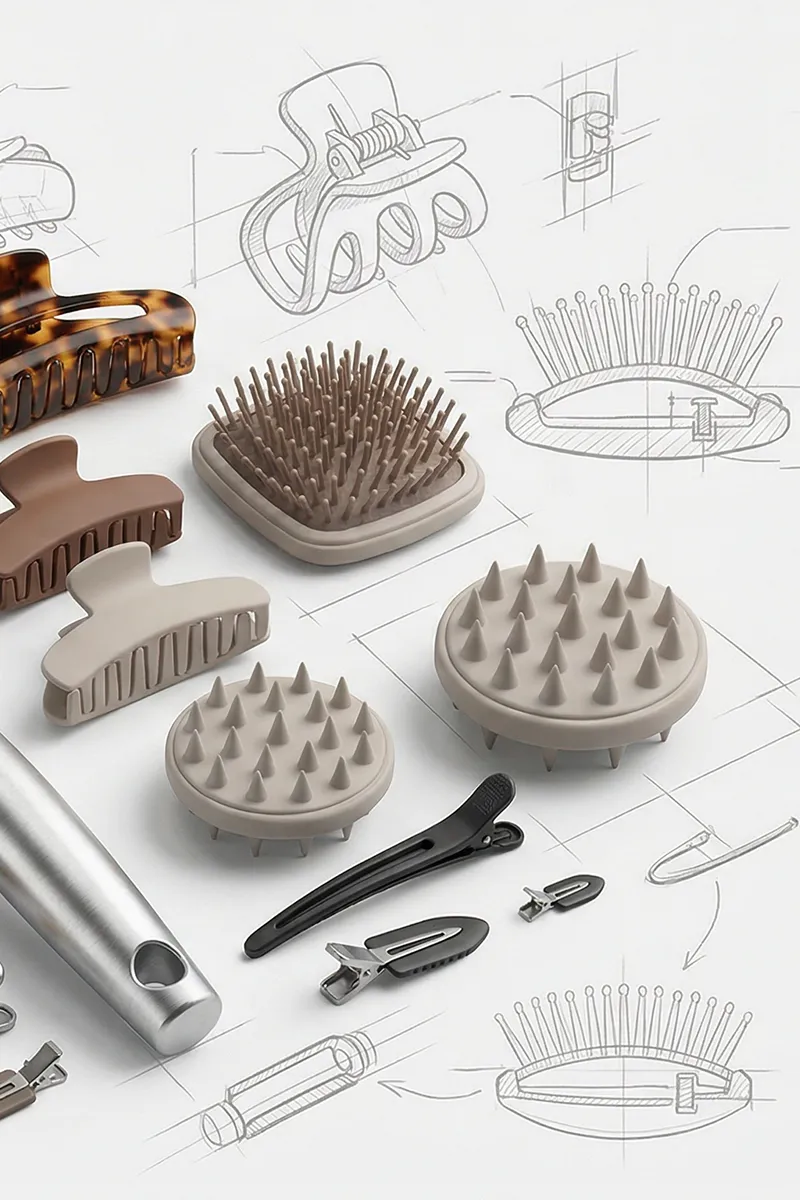
5. Stage 4: Logo Application and Spring Assembly
Logo Application
Brand logos are applied to the polished clip body before spring assembly. The two primary methods for acetate are laser engraving (a focused laser beam vaporises a thin layer of material to create a permanent recessed mark) and hot stamping (a heated die presses metallic foil onto the surface to create a gold, silver, or coloured logo). Pad printing is also used for full-colour logos but is less common on acetate due to adhesion challenges on the polished surface. For detailed comparisons of logo methods, the same principles apply across clip and brush categories.
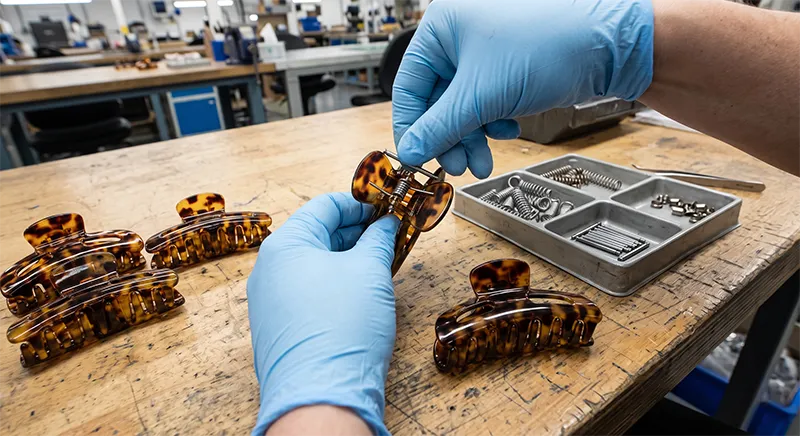
Spring Mechanism Assembly
Claw clips require a spring bar and hinge mechanism to create the open-and-close action. Assembly involves inserting a steel spring bar through pre-drilled hinge holes in the two clip body halves, securing the bar with end caps or crimps, and testing the completed assembly for jaw alignment, bite pressure, and smooth opening and closing. Spring steel grade, coil count, and anti-rust coating are critical specifications that affect clip durability — the spring is the most common failure point in claw clip construction. For detailed technical information on spring and metal component specifications, see the article on metal components for custom acetate hair clips.
Assembly is primarily manual. Skilled workers assemble, test, and adjust each clip individually. Automated spring insertion is used by some larger manufacturers for simple designs, but complex or multi-piece mechanisms still require hand assembly.
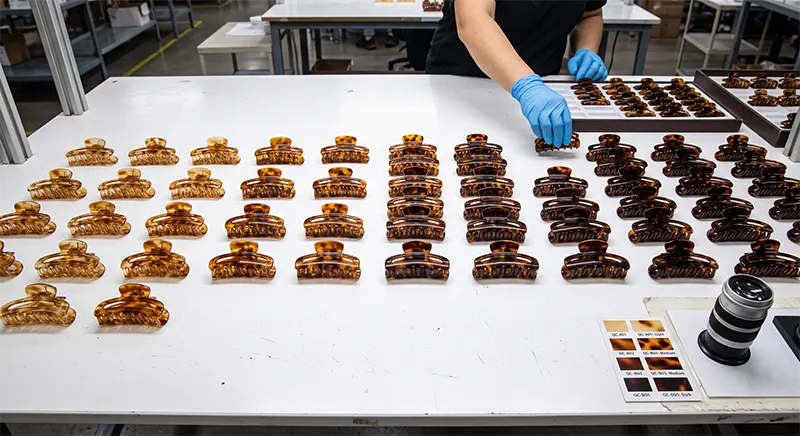
6. Stage 5: Quality Control and Inspection
Quality control in acetate clip production operates at multiple checkpoints because each production stage introduces specific failure modes that must be caught before the clip advances to the next step.
| Inspection Point | What Is Checked | Common Defect Types |
|---|---|---|
| Incoming sheet inspection | Thickness uniformity, colour match against master chips (D65 lighting), surface defects (bubbles, inclusions), curing completeness | Colour deviation, thickness variation, under-cured material |
| Post-cutting inspection | Blank dimensions against drawing, edge quality, stress marks from cutting | Dimensional inaccuracy, micro-cracks at cut edges |
| Post-shaping inspection | Jaw symmetry, tooth alignment, curve profile against mould reference, material discolouration from overheating | Asymmetric jaws, spring-back deformation, yellowing |
| Post-polishing inspection | Surface smoothness (visual and tactile), edge rounding completeness, absence of scratches or dull spots | Uneven polish, remaining burrs, polish compound residue |
| Post-assembly inspection | Spring tension measurement, jaw alignment when closed, smooth open/close action, hinge security, logo position and quality | Weak spring, misaligned bite, logo placement error, hinge wobble |
| Final pre-shipment inspection | AQL sampling of finished, packed goods — all parameters above plus packaging integrity, colour sorting within shipment, barcode accuracy | Mixed colour batches, packaging damage, label errors |
The colour sorting step in final inspection is unique to acetate production. Because natural batch-to-batch variation is inherent to the material, finished clips must be grouped by colour intensity and pattern distribution to ensure each carton or shipment contains visually harmonised units. This sorting step does not apply to ABS clips, where colour is machine-consistent. For a full comparison of acetate and ABS production processes, see the technical guide on cellulose acetate versus ABS plastic for hair clips.
7. Complete Production Timeline and Cost Implications
The following table summarises the full production sequence with estimated duration and cost weight for each stage.
| Stage | Process | Duration per Unit | Cost Weight |
|---|---|---|---|
| 1. Sheet inspection and selection | Incoming QC against colour masters | Batch-level (not per-unit) | Low (labour only) |
| 2. Cutting (CNC or die) | Blank cutting from sheet | Seconds per blank | Medium (machine + material waste) |
| 3. Heating | Softening to 80-90 degrees C | 30-60 seconds | Low (energy) |
| 4. Press moulding | Shaping in metal mould | 30-60 seconds (including cooling) | Low-Medium (machine + mould depreciation) |
| 5. Tumble polishing | Barrel rotation with abrasive media | Hours (batch process) | Medium (time + consumables) |
| 6. Hand polishing | Manual buffing on rotating wheel | Minutes per unit | High (skilled labour — 30-40% of total labour cost) |
| 7. Logo application | Laser engraving or hot stamping | Seconds per unit | Low-Medium |
| 8. Spring assembly | Manual spring bar insertion and testing | 30-90 seconds per unit | Medium (labour + spring component cost) |
| 9. QC and sorting | Inspection, colour sorting, packing | Seconds per unit (sampling-based) | Low-Medium |
Total bulk production lead time for acetate clips is typically 25 to 35 days from confirmed order to packed goods — longer than the 20 to 30 days typical for ABS injection-moulded clips. The hand polishing stage is the primary bottleneck. For complete lead time planning including sampling, tooling, and shipping, see the guide on lead time for custom hair accessories. For cost structure context, see the guide on manufacturing costs for custom hair clips in China.
8. Conclusion
Cellulose acetate hair clip manufacturing is a process where material quality, thermal precision, and manual craftsmanship intersect. The production sequence — sheet inspection, CNC cutting, heat shaping, tumble and hand polishing, logo application, spring assembly, and multi-stage QC — is fundamentally different from the single-cycle injection moulding process used for ABS clips. This difference is what produces acetate's distinctive weight, translucency, and surface quality — and it is also what drives the higher per-unit cost, longer lead time, and narrower margin for error that define acetate production economics.
For brands evaluating custom acetate hair clip production, the key manufacturing questions centre on polishing quality (is the factory's hand polishing consistently achieving the expected finish?), sheet sourcing (does the manufacturer have a reliable acetate sheet supply chain with tight batch-to-batch colour tolerance?), and spring specification (is the spring mechanism treated as a critical component or an afterthought?). These three factors account for the vast majority of quality variation between acetate clip manufacturers.
Manufacturers such as JunYi Beauty, operated by Dongguan JunYi Beauty Technology Co., Ltd., maintain dedicated acetate production lines covering CNC cutting, heat shaping, tumble and hand polishing, laser engraving, and spring assembly — alongside separate ABS injection moulding capability. With certifications including ISO 9001, amfori BSCI, BRCGS, GRS 4.0, and FSC, and a mould library of over 200 active claw clip designs, the company provides factory-direct OEM production for custom acetate hair clips across premium retail, private label, and wholesale channels. For a comparison of established acetate clip manufacturers, see the guide on top acetate hair accessories manufacturers.